How to Register on ICEGATE: 7 Easy Steps for Importers and Exporters
How to register on ICEGATE comes down to seven steps, and most rejected applications fail at just two of them. Without an active account you cannot file a single Bill of Entry or Shipping Bill electronically, which means held cargo, demurrage at the port, and a customs broker who cannot file on your behalf. This guide sets out how to register on ICEGATE in the correct order, the documents customs actually checks, and where first time applicants get stuck.
Who This Guide Is For
This is written for importers, exporters, customs brokers, and authorised employees who need to know how to register on ICEGATE for the first time. It is not a duty payment or exchange rate guide, since both come after your account is live. If you do not yet hold an Import Export Code, complete the IEC registration process first, because your profile is built on top of it.
What the Account Actually Is
Registering creates a verified account on the Common Customs Electronic Portal, the platform CBIC uses for electronic filing of customs documents.
Its legal standing is not informal. Under Section 154C of the Customs Act, 1962, read with clause (7B) of Section 2, CBIC notified icegate.gov.in as the Common Customs Electronic Portal through Notification G.S.R. 217(E). That makes it the statutory channel for registration, filing, and duty payment. The notification is published by CBIC.
In practice, the account links your IEC, PAN, GSTIN, and Digital Signature Certificate into one profile. On approval you receive an ICEGATE ID, the credential behind every filing you make afterwards.
CBIC has been rolling out ICEGATE 2.0 in phases since 16 November 2022, so screens in older tutorials will not match what you see today.
Where This Sits Among Your Other Registrations
Businesses often treat these as interchangeable. They are not, and the order matters once you start working out how to register on ICEGATE.
Requirement
What It Covers
Needed First?
Issued By
IEC (Import Export Code)
Authorises your firm to trade internationally
Yes, mandatory prerequisite
DGFT
GST Registration
Tax registration linked to your filings
Yes, for most entities
GST Department
ICEGATE Registration
Portal access for electronic customs filing
This is the requirement itself
CBIC
AD Code Registration
Links your bank account for duty payment and refunds
No, filed after ICEGATE
Bank, verified by Customs
Portal access is the access layer. It does not discharge your underlying obligations, it is what lets you meet them electronically instead of filing paper at a customs house.
Documents You Need Before You Start
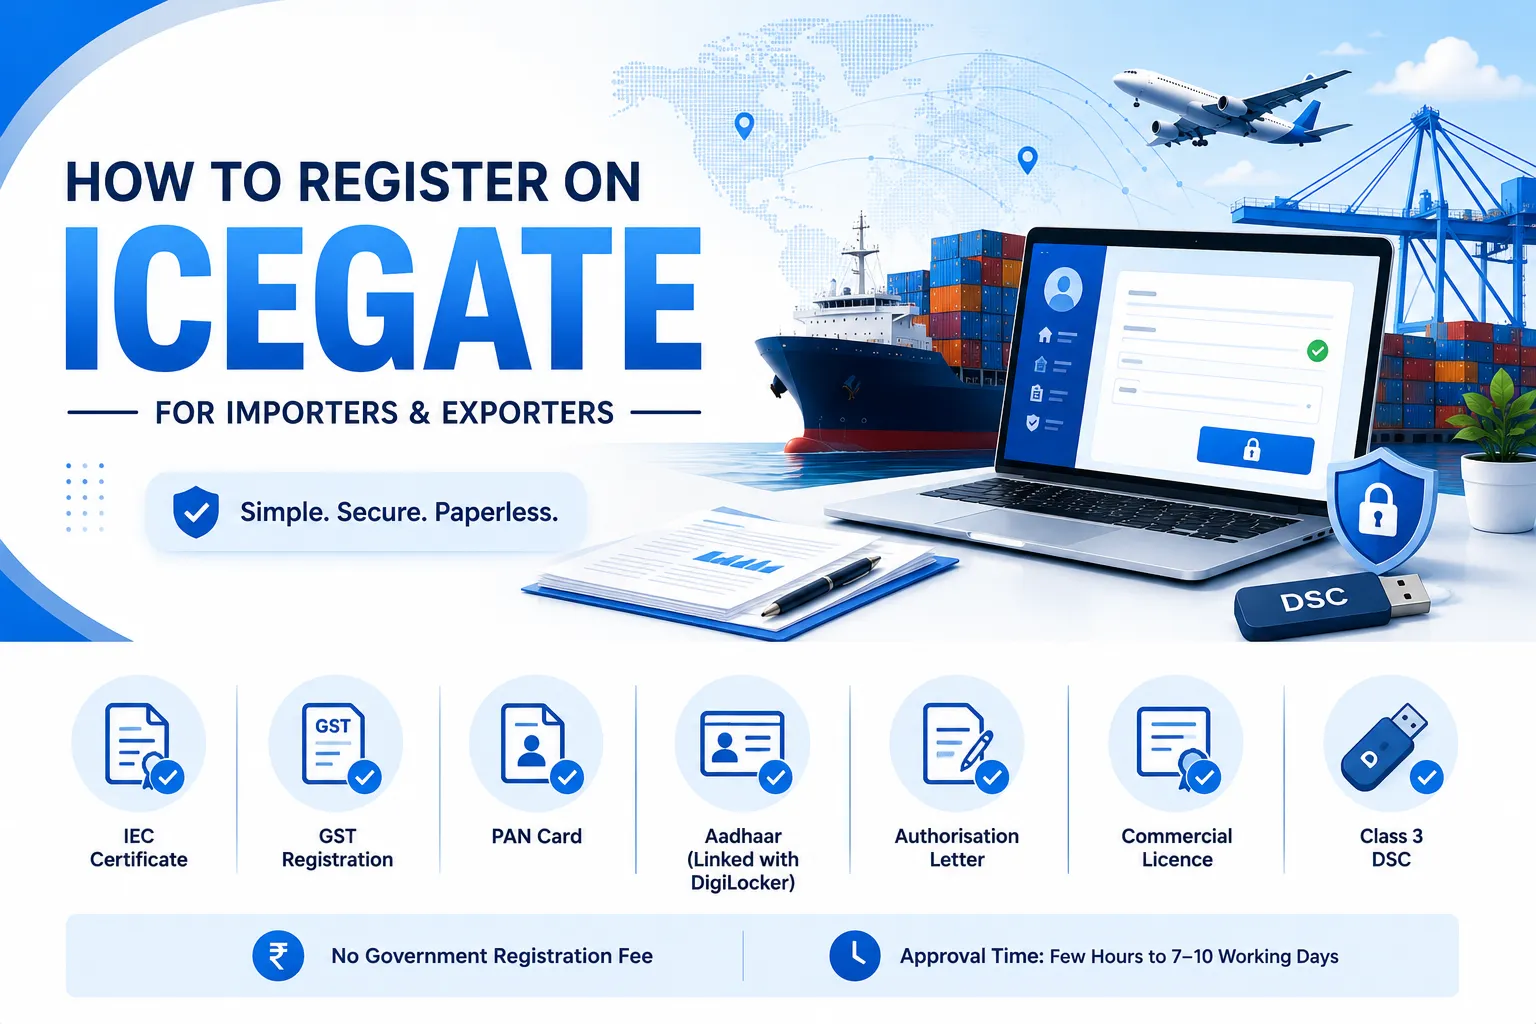
Keep self attested soft copies ready before you begin. Uploading a mismatched or scanned copy midway is the biggest single cause of delay for anyone learning how to register on ICEGATE.
PAN card of the entity or individual, with the name matching PAN records exactly
GST registration certificate
Aadhaar of the authorised representative, linked with DigiLocker
Authorisation letter issued by the organisation on letterhead
Commercial licence relevant to your role, such as a CHA licence or shipping line licence
Class 3 Digital Signature Certificate for the authorised signatory
Confirm the current list on the official portal before you begin, since CBIC updates requirements by circular.
How to Register on ICEGATE: Step by Step
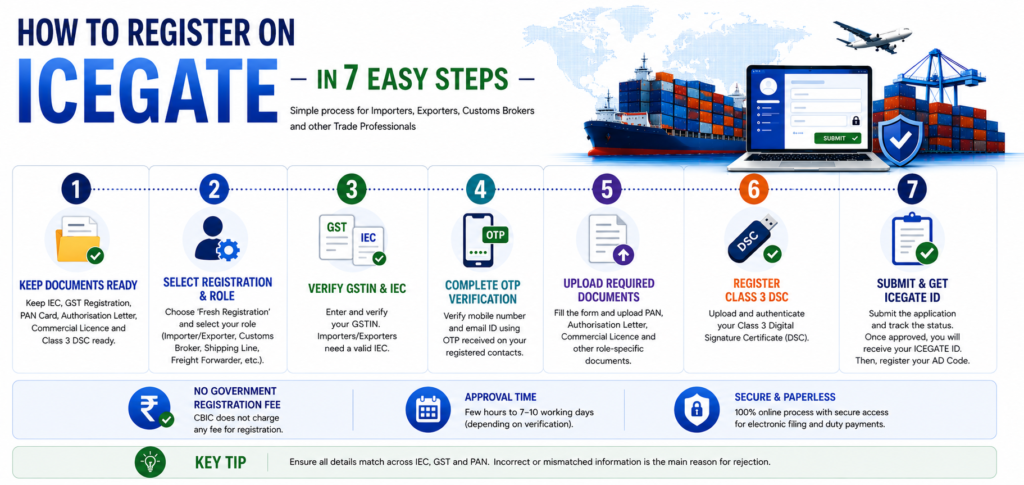
Step 1: Reconcile your IEC and GST details first
Check that your legal name, address, and identifiers match across your IEC certificate, GST registration, and PAN. The portal pulls contact details straight from GSTN records, and from DGFT records for importers and exporters. If those details are stale, fix them at source first. This one check prevents most rejections.
Step 2: Choose fresh registration and select your role
Open the portal and choose Fresh Registration, Don’t have Reference ID. If you started earlier and hold an unexpired Reference ID, choose Continue using Reference ID instead.
You then pick your role: Importer or Exporter, Customs Broker, Shipping Line, Airline, Freight Forwarder, Console Agent, or Custodian. Courier operators handling express cargo register separately through ECCS. Your role decides your access level, so getting it wrong means reapplying later.
Step 3: Verify your GSTIN and IEC
Enter your GSTIN. Importers and exporters will also be asked for a valid IEC. The system validates both against live government records before letting you proceed.
Step 4: Authenticate mobile and email by OTP
The portal displays the contact details already held in GSTN or DGFT records. Select one set and verify it.
A six digit OTP goes to your mobile, and a second to your email. Each must be entered within 600 seconds or it expires. If neither listed contact is one you want to use, update it in GSTN or DGFT first and restart. You cannot type a fresh number into this screen.
Step 5: Complete the role registration form and upload documents
Fill the role registration form and attach your PAN, authorisation letter, commercial licence, and any bank proof your role requires.
Step 6: Register your Class 3 DSC
Upload and authenticate your Class 3 Digital Signature Certificate using the portal signer utility. Install and run emSigner before you reach this screen, because a DSC not detected error is the most common blocker at this stage. First time setup is covered in our Class 3 Digital Signature Certificate guide.
Step 7: Submit, track, then register your AD Code
You receive an acknowledgement number on submission. Customs cross checks your documents before approving. The official processing window is 3 to 4 working days, though record mismatches and peak load can extend it.
That completes how to register on ICEGATE. Once your ID is live, finish AD Code registration. Under CBIC Instruction No. 25/2023-Customs, AD Code registration is a single registration valid across all Indian customs ports under the same IEC, so you no longer repeat it port by port.
What It Costs
CBIC charges no government fee. Learning how to register on ICEGATE costs you time, not money.
Cost enters only if you engage a consultant for documentation and DSC setup, which is a service charge, not a statutory one.
The real cost sits elsewhere. A pending or rejected application means no electronic filing at all, which pushes shipments into manual fallback and stalls clearance at the port. On tight shipment windows, accurate documentation the first time is worth far more than any fee saved.
How to Register on ICEGATE Without Getting Rejected
Starting before IEC, PAN, and GST records agree. Name and address mismatches drive the majority of rejections.
Leaving DSC setup until Step 6. Test emSigner and your token days earlier, not mid application.
Selecting the wrong role. A customs broker registered as an importer will hit access limits and need to reapply.
Expecting to type in a new email or mobile. The portal only offers what GSTN and DGFT already hold. Update at source first.
Treating the account as a substitute for IEC or AD Code. It is the access layer, not a replacement for either.
Letting the DSC lapse after approval. The account stays active, but filings stop the day the certificate expires.
How JPARKS India Helps
JPARKS INDIA is an EXIM compliance consultancy handling ICEGATE, IEC, DSC, and AD Code filings end to end for importers and exporters across India, backed by 35+ years of EXIM compliance experience, 500+ clients served, and a 5.0 Google rating.
Entities exempt from GST can still register, but the portal validates your IEC and PAN against DGFT records instead. Confirm your DGFT profile carries a current email and mobile before you start, since OTP verification pulls from there.
Q2. Is a Class 3 DSC mandatory?
Yes, for the current registration module. The older simplified module allowed limited access without one, but it has been withdrawn, and every new applicant now authenticates with a Class 3 DSC.
Q3. How long does ICEGATE ID approval take?
The official figure is 3 to 4 working days after submission, per the ICEGATE 2.0 FAQ published by the Directorate General of Systems and Data Management. Clean applications clear in that window. Files needing record corrections, or filed during peak load, can run to 7 to 10 working days.
Q4. Can I link two IECs to one login?
No. Each IEC requires its own registration and its own unique email address. The same email cannot be reused across accounts.
Q5. Does an ICEGATE account expire?
No. The account itself does not lapse. Keep your DSC, email, and mobile current, because an expired certificate blocks filings even on an otherwise active account.
Need this handled for you?
Tell us where you are stuck. We usually reply the same business day.
5.0 ★ · 123 Google reviews · Since 1990
Posted on Google
Vandana Bajaj
Trustindex verifies that the original source of the review is Google.
Very prompt and reliable service by Rahul Kolge and his team. Exceptional and happy experience.
Posted on Google
Supriya Shetye
Trustindex verifies that the original source of the review is Google.
Had a really good experience with JParks India. Rahul sir helped me a lot with my import work and were always active and responsive. Whatever documents or guidance was needed, they handled everything smoothly and explained things clearly. Felt stress-free throughout the process. Very helpful team, definitely recommend them if you’re doing import or export.
Posted on Google
dipali sakpal
Trustindex verifies that the original source of the review is Google.
Very nice people, get the work done in a very short time.
Posted on Google
Satish Bajaj
Trustindex verifies that the original source of the review is Google.
Excellent & Prompt services in all Import Export matters.
Great to work with you
Posted on Google
Bajaj VCPL
Trustindex verifies that the original source of the review is Google.
It was a great experience having work with you.
Posted on Google
Satish Bajaj
Trustindex verifies that the original source of the review is Google.
"Outstanding professiona services, efficient, and gets things done incredibly fast. Highly recommended for anyone needing reliable and prompt assistance
Posted on Google
Nishat fatima
Trustindex verifies that the original source of the review is Google.
excellent service
Posted on Google
farhan sayed
Trustindex verifies that the original source of the review is Google.
JParks Team is Super helpful! Thanks to Rahul and team!
Posted on Google
Sadik Inamdar
Trustindex verifies that the original source of the review is Google.
Good and personal service for import export code
Posted on Google
Maheshwar
Trustindex verifies that the original source of the review is Google.
Had a really good experience with JParks India. Rahul sir helped me a lot with my import work and were always active and responsive. Whatever documents or guidance was needed, they handled everything smoothly and explained things clearly. Felt stress-free throughout the process. Very helpful team, definitely recommend them if you’re doing import or export.
Verified by Trustindex
Trustindex verified badge is the Universal Symbol of Trust. Only the greatest companies can get the verified badge who has a review score above 4.5, based on customer reviews over the past 12 months. Read more
We use cookies to run this site, measure traffic, and track our ads. Essential cookies are always on. Accept all, reject non-essential, or set your preferences.
Cookie Preferences
Manage your cookie preferences below:
Essential cookies enable basic functions and are necessary for the proper function of the website.
Name
Description
Duration
Cookie Preferences
This cookie is used to store the user's cookie consent preferences.
30 days
Google reCAPTCHA helps protect websites from spam and abuse by verifying user interactions through challenges.
Name
Description
Duration
_GRECAPTCHA
Google reCAPTCHA sets a necessary cookie (_GRECAPTCHA) when executed for the purpose of providing its risk analysis.
179 days
Google Tag Manager simplifies the management of marketing tags on your website without code changes.
Name
Description
Duration
cookiePreferences
Registers cookie preferences of a user
2 years
td
Registers statistical data on users' behaviour on the website. Used for internal analytics by the website operator.
session
Statistics cookies collect information anonymously. This information helps us understand how visitors use our website.
Google Analytics is a web analytics service that tracks and reports website traffic. It collects anonymized data on how visitors use the site to help us understand and improve performance.